Setting up for class work
You will want to make a folder to hold all of your work for class;
you can pick your own name, but for the purposes of this guide I will
use cs161Work as an example.
Any time you are making a folder or file for a CS class, here are some important tips:
Don't use spaces in file or folder names - they cause issues for some tools you will need to use.
NO:"cs161 Work"
YES:"cs161Work"Don't put folders in OneDrive or iCloud. Those tools do tricky things to the filesystem that can cause issues. If you are on Windows, and put a folder in your
Documents, make sure it is in a folder like"C:\Users\YOURNAME\Documents"andOneDrivedoes not appear in the folder path.
Once you have created your work directory, download the
Chemeketa project
templates. They are packaged as a zip file, which you should
extract
into your work directory. The result will be three template folders
(BasicProject, UnitTestProject, and ComboProject). Any time you
write a program for class, you will start by copying one of these folders.
Starting a coding project from a template
This video demonstrates how to use the templates.
Here are the steps.
Copy the folder of the template you want to use (if you are not sure, you probably want
BasicProject).Paste the copy wherever you want to put your project, say, in
cs161Work. (If the template is already in the same directory, the copy might automatically get renamed something likeBasicProject Copy. If you put your templates into their own subdirectory, pasting the copy intocs161Workwon't create a name conflict. Either way is okay, because the next step is to...)Rename the copy. For assignments, you will want to use the name specified in the assignment (something like
assign1). For other work, you can make up a name. For convenience, avoid spaces (i.e.TestProgramrather thanTest Program).Open VS Code and do
File→Open Folderto open the folder you created. Or, from the file browser, you can probably right click in that folder and choose ‘Open in Code’.Hit
F5or go to the menu optionRun→Start Debugging. Your program should build and display ‘Hello World’ in the Terminal pane at the bottom of the window.If you are on a Mac, you will need to change the project run setting before you press
F5to build the first time. See the instructions below.
Changing how the project builds and runs
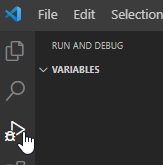
Sometimes it may be necessary to change the run configuration. For example, there is a slightly different configuration necessary on a Mac, and the default is the one appropriate for Windows and Linux. You will also change run configurations to switch between the main program and the tests in a combo project. To change between the provided run configurations, first switch to the ‘Run and Debug’ view (the icon looks like a play button with a bug).
From the drop-down by the green play button, choose the run configuration you want, e.g. ‘Run Program (Mac)’ or ‘Run Tests’.

You can now build and run the program by clicking the green play button
in the ‘Run and Debug’ view, or using F5 as normal.